Spaces:
Runtime error


A newer version of the Gradio SDK is available:
6.0.1
Read in other language: 中文.
Local-Code-Interpreter
A local implementation of OpenAI's ChatGPT Code Interpreter (Advanced Data Analysis).
Introduction
OpenAI's Code Interpreter (currently renamed as Advanced Data Analysis) for ChatGPT is a revolutionary feature that allows the execution of Python code within the AI model. However, it execute code within an online sandbox and has certain limitations. In this project, we present Local Code Interpreter – which enables code execution on your local device, offering enhanced flexibility, security, and convenience.

Key Advantages
Custom Environment: Execute code in a customized environment of your choice, ensuring you have the right packages and settings.
Seamless Experience: Say goodbye to file size restrictions and internet issues while uploading. With Local Code Interpreter, you're in full control.
GPT-3.5 Availability: While official Code Interpreter is only available for GPT-4 model, the Local Code Interpreter offers the flexibility to switch between both GPT-3.5 and GPT-4 models.
Enhanced Data Security: Keep your data more secure by running code locally, minimizing data transfer over the internet.
Jupyter Support: You can save all the code and conversation history in a Jupyter notebook for future use.
Note
Executing AI-generated code without human review on your own device is not safe. You are responsible for taking measures to protect the security of your device and data (such as using a virtural machine) before launching this program. All consequences caused by using this program shall be borne by youself.
Usage
Installation
Clone this repository to your local device
git clone https://github.com/MrGreyfun/Local-Code-Interpreter.git
cd Local-Code-Interpreter
Install the necessary dependencies. The program has been tested on Windows 10 and CentOS Linux 7.8, with Python 3.9.16. Required packages include:
Jupyter Notebook    6.5.4
gradio              3.39.0
openai              0.27.8
ansi2html           1.8.0
tiktoken            0.3.3
Pillow              9.4.0
Other systems or package versions may also work. Please note that you should not update the
openaipackage to the latest1.xversion, as it has been rewritten and is not compatible with older versions. You can use the following command to directly install the required packages:pip install -r requirements.txtFor newcomers to Python, we offer a convenient command that installs additional packages commonly used for data processing and analysis:
pip install -r requirements_full.txt
Configuration
Create a
config.jsonfile in thesrcdirectory, following the examples provided in theconfig_exampledirectory.Configure your API key in the
config.jsonfile.
Please Note:
Set the
model_nameCorrectly This program relies on the function calling capability of the0613or newer versions of models:gpt-3.5-turbo-0613(and its 16K version)gpt-3.5-turbo-1106gpt-4-0613(and its 32K version)gpt-4-1106-preview
Older versions of the models will not work. Note that
gpt-4-vision-previewlacks support for function calling, therefore, it should not be set asGPT-4model.For Azure OpenAI service users:
- Set the
model_nameas your deployment name. - Confirm that the deployed model corresponds to the
0613or newer version.
API Version Settings If you're using Azure OpenAI service, set the
API_VERSIONto2023-12-01-previewin theconfig.jsonfile. Note that API versions older than2023-07-01-previewdo not support the necessary function calls for this program and2023-12-01-previewis recommended as older versions will be deprecated in the near future.Vision Model Settings Despite the
gpt-4-vision-previewcurrently does not support function calling, we have implemented vision input using a non-end-to-end approach. To enable vision input, setgpt-4-vision-previewasGPT-4Vmodel and setavailabletotrue. Conversely, settingavailabletofalseto disables vision input when unnecessary, which will remove vision-related system prompts and reduce your API costs.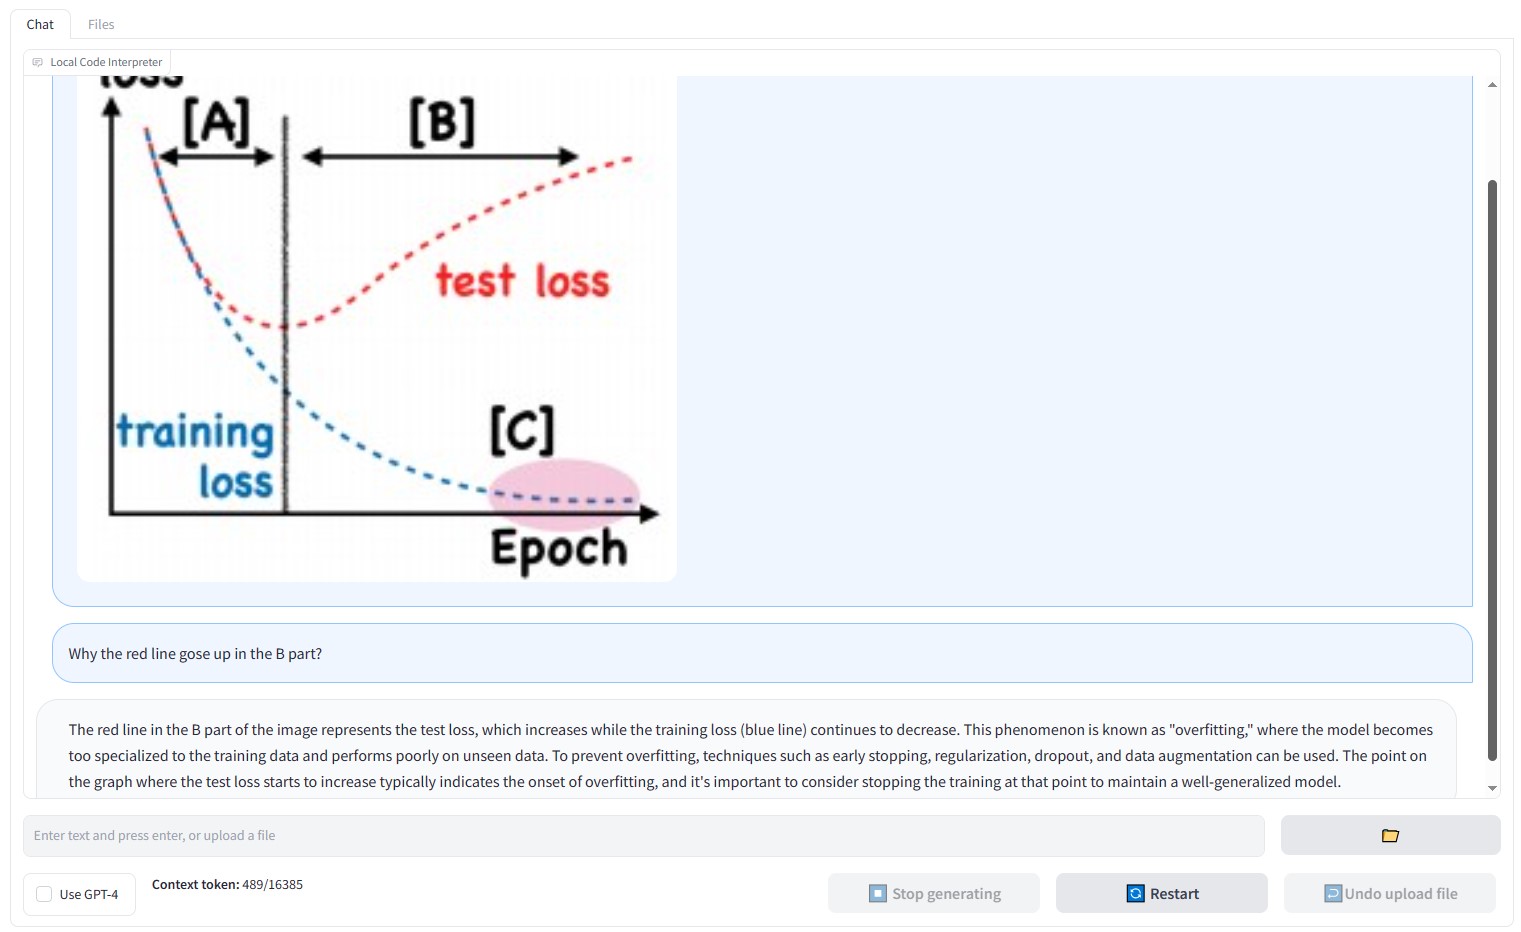
Model Context Window Settings The
model_context_windowfield records the context window for each model, which the program uses to slice conversations when they exceed the model's context window capacity. Azure OpenAI service users should manually insert context window information using the model's deployment name in the following format:"<YOUR-DEPLOYMENT-NAME>": <contex_window (integer)>Additionally, when OpenAI introduce new models, you can manually append the new model's context window information using the same format. (We will keep this file updated, but there might be delays)
Alternate API Key Handling If you prefer not to store your API key in the
config.jsonfile, you can opt for an alternate approach:- Leave the
API_KEYfield inconfig.jsonas an empty string:"API_KEY": "" - Set the environment variable
OPENAI_API_KEYwith your API key before running the program:- On Windows:
set OPENAI_API_KEY=<YOUR-API-KEY>- On Linux:
export OPENAI_API_KEY=<YOUR-API-KEY>
- Leave the

Getting Started
Navigate to the
srcdirectory.cd srcRun the command:
python web_ui.pyAccess the generated link in your browser to start using the Local Code Interpreter.
Use the
-nor--notebookoption to save the conversation in a Jupyter notebook. By default, the notebook is saved in the working directory, but you can add a path to save it elsewhere.python web_ui.py -n <path_to_notebook>
Example
Imagine uploading a data file and requesting the model to perform linear regression and visualize the data. See how Local Code Interpreter provides a seamless experience:
Upload the data and request linear regression:

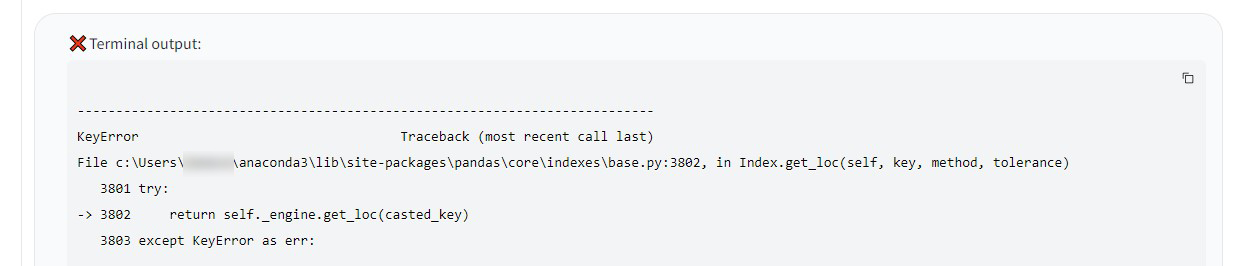
Encounter an error in the generated code:
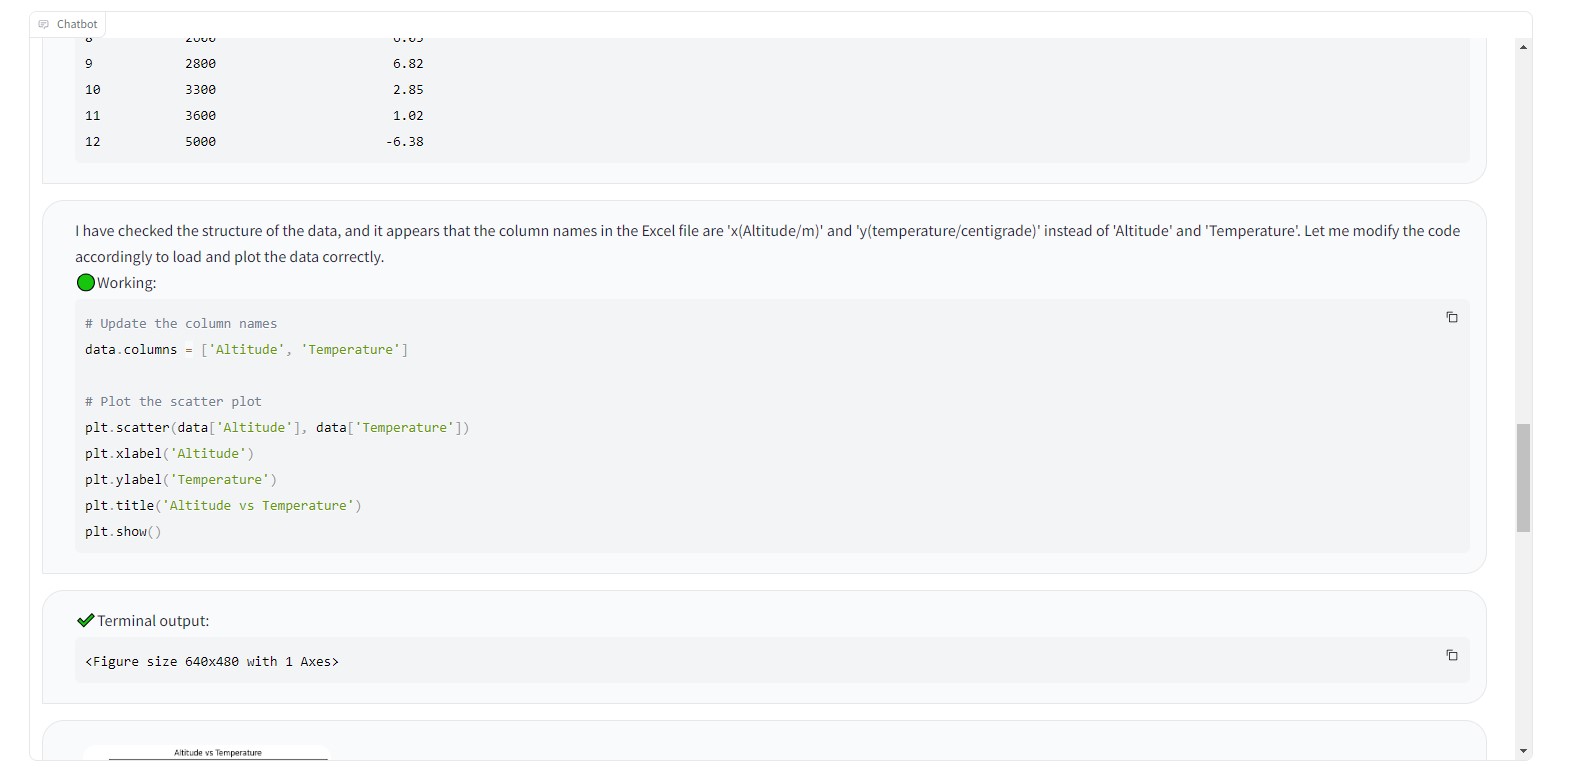
ChatGPT automatically checks the data structure and fixes the bug:

The corrected code runs successfully:
The final result meets your requirements:


